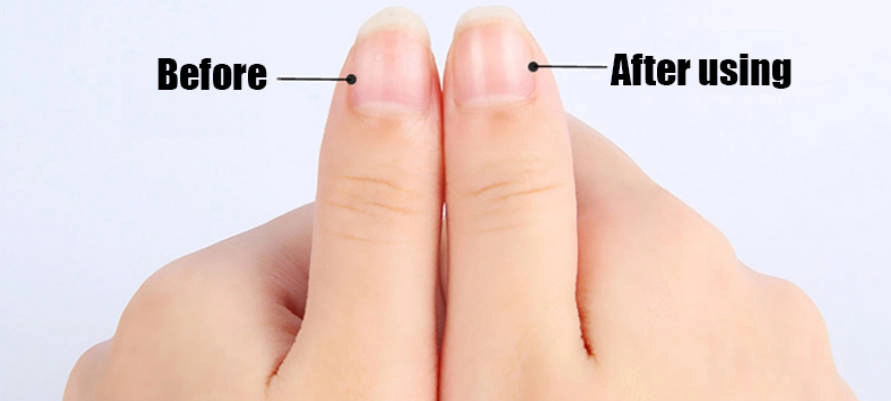
You don’t need to hit up a salon to get nails that look amazing. With just a little tool, you can smooth them out, fix any rough bits, and make them super shiny at home in, like, five minutes. A sponge nail buffer with 180/240 grit is my go-to because it’s gentle but totally gets the job done. Here’s how to use it step by step, plus some tricks to keep your nails looking fab and feeling healthy.
What’s a Sponge Nail Buffer Anyway?
What’s It Made Of?
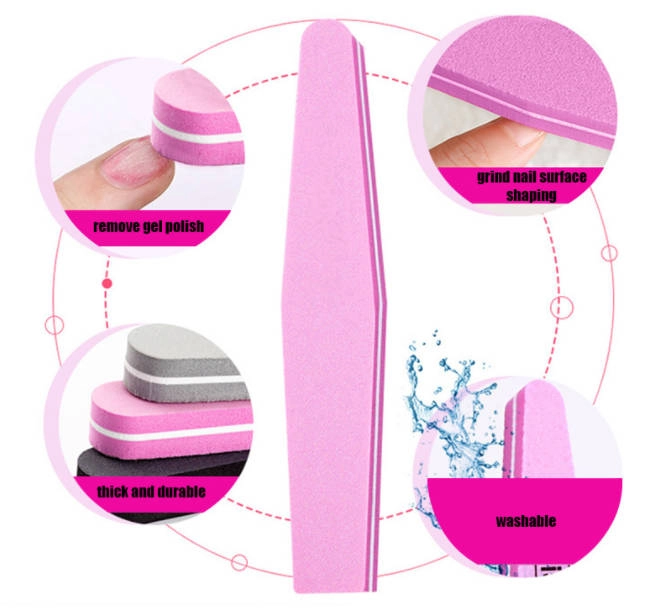
Picture a soft, squishy little block with a gritty surface, kinda like super fine sandpaper. I saw one from Felice called the High Elastic Sponge 2-Sided Nail Buffer Block with Custom Logo. They say it’s “light, tough, and you can put your own logo on it.” That cushy middle molds right to your nails, so it feels way comfier than those hard, scratchy boards.
How’s It Different from Emery Boards or Blocks?
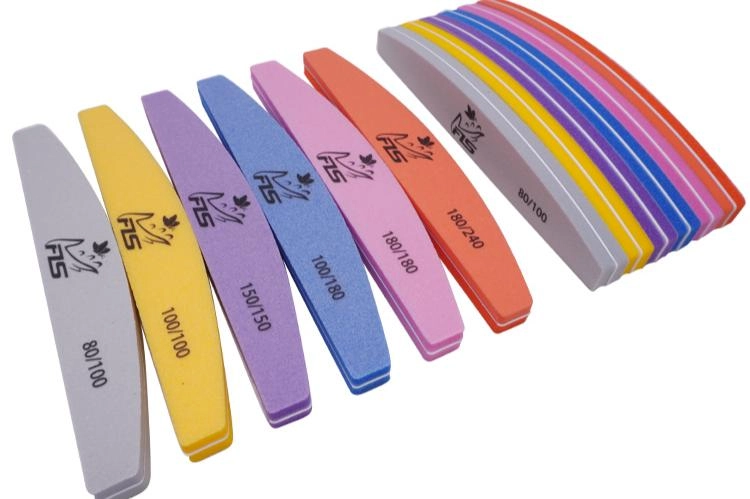
Emery boards are flat and kinda rough, so they can be harsh on your nails. Sponge buffers? They’re soft and way less likely to cause trouble. They’re also not like those chunky buffer blocks. With two sides—180 grit for smoothing and 240 for shining—they’re easy to hold and do a ton.
Why a 180/240 Grit Buffer Rocks
What’s the 180 Grit Side For?
The 180 grit side’s a bit rougher. It smooths out little bumps or rough patches. It gets your nails prepped without being too aggressive.
What’s the 240 Grit Side For?
The finer 240 grit side is where the magic happens. It polishes your nails to make them smooth and sparkly.
Why It’s So Good
Using both sides one after the other is like a one-two punch. It fixes any flaws and leaves your nails shiny without doing any harm.
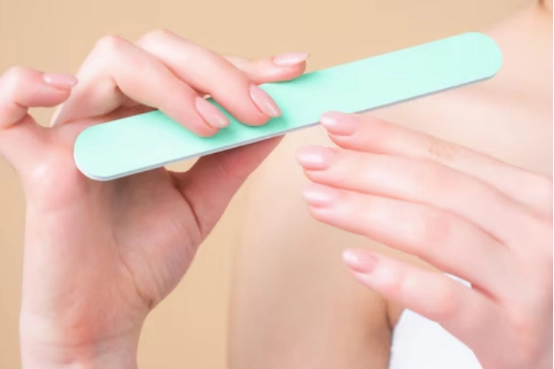
Step-by-Step: How to Use Your Sponge Nail Buffer
Step 1: Get Your Nails Ready
Wash your hands good. Make sure your nails are bone-dry. Trim and shape them with a file before you even think about buffing.
Step 2: Start with the 180 Grit Side
Gently rub away any bumps or uneven spots. Just use light strokes. A couple passes per nail is plenty. It should feel chill, not like you’re sanding wood.
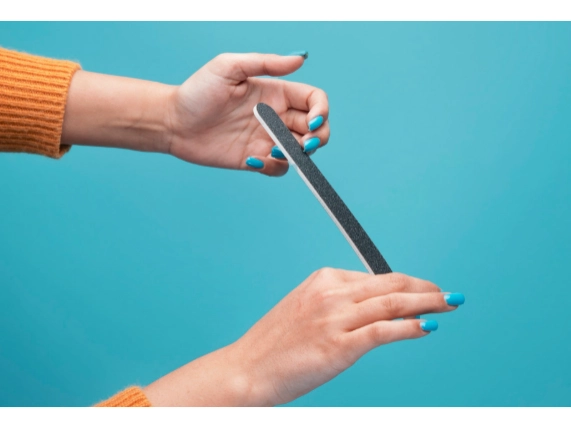
Step 3: Flip to the 240 Grit Side
Turn the buffer over. Polish each nail with soft, swirly motions. This is what makes your nails smooth and gives them that nice glow.
Step 4: Get That Crazy Shiny Look
Keep doing super light passes with the 240 grit side till your nails look glossy, like glass. Wanna make them pop even more? Dab on some buffing cream or nail oil.
Step 5: Pamper Your Nails After
Grab some cuticle oil or cream and rub it into your nails and cuticles. It keeps them hydrated, strong, and looking shiny.
Don’t Mess Up Your Nails
Why Going Overboard Is Bad
Even a soft buffer can thin out your nails if you get carried away. Thin nails can feel sore or even start peeling, which is no fun.
How Often Should You Buff?
If your nails are natural, buff them maybe once every couple weeks. If you’re prepping for polish, once per manicure’s enough.
When to Ditch Your Sponge Nail Buffer
Signs It’s Toast
If the gritty part’s worn down or the edges are all frayed, it’s not gonna work right. If it feels too smooth, toss it and get a new one.
How Long It Lasts
These buffers usually last one to three months, depending on how much you use them. Swap it out now and then to keep things fresh and clean.
Stuff to Avoid Doing
Here’s what a lot of people mess up:
- Pushing way too hard when buffing
- Buffing nails when they’re wet
- Forgetting to clean their nails first
- Using a beat-up, old buffer
- Skipping the moisturizer after
Dodge these mistakes, and your nails will stay healthy and look awesome.
Business Note: Sponge Nail Buffers for Salons and Brands
Why Salons Are Obsessed
Salons love sponge buffers because they’re comfy to use and super gentle, so they’re great for clients. Plus, the two grits mean you don’t need a million tools.
Cool Custom Options
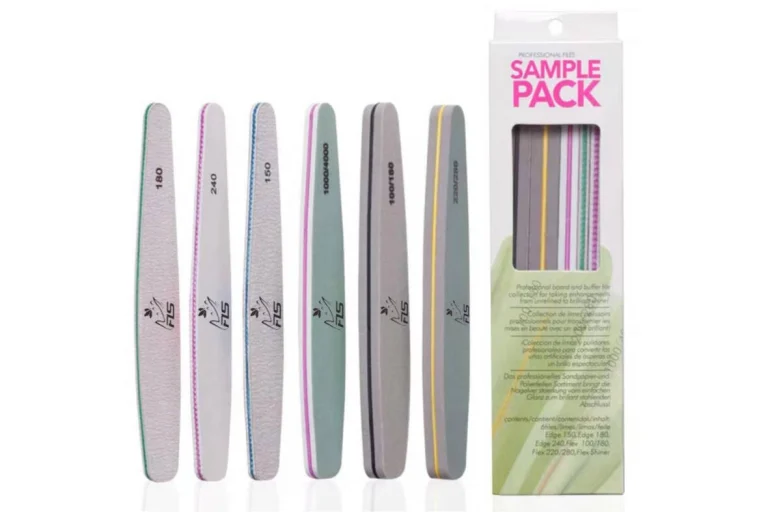
Brands like Felice let you make these buffers your own. You can add your logo or pick fun packaging. They’re flexible with order sizes, which is perfect for beauty brands wanting their own stuff. You can even get samples to make sure everything’s top-notch before ordering a bunch.
A sponge nail buffer with 180/240 grit is such an easy way to get killer nails. It smooths them out, makes them shiny, and gives you that polished vibe with barely any work. Whether you’re doing your own nails or running a salon, a good buffer makes your nails look amazing and keeps them healthy. For businesses, hooking up with folks like Felice means you can add your own flair and order what you need.
FAQ
Q: What’s the deal with sponge nail buffers vs. sponge nail files?
A: A sponge nail buffer smooths and shines the top of your nails. A sponge nail file shapes the edges. Buffers are for that glossy vibe, files are for getting the shape right.
Q: Can I just use a sponge nail file instead of a buffer?
A: Nah, not really. A sponge nail file shapes your nails but won’t give you that sparkly shine a 180/240 grit buffer does. Use a file for shaping and a buffer for smoothness and glow.
Q: How often should I get a new sponge nail buffer?
A: Grab a new one every one to three months, depending on how much you use it. If the grit’s dull or the sponge looks rough, it’s time for a fresh one.
Q: Are sponge nail files okay for natural nails?
A: Totally! They’re way softer than metal or stiff emery boards. Just don’t go too hard, and you’re good.
Q: Can salons get sponge nail buffers and files with their own logo?
A: Yup! Brands like Felice let salons and shops customize buffers and files with their logos and packaging for their own product lines.