Nail stickers are legit the best for nail art. They’re quick, no-fuss, and let you get all artsy without needing pro gear or mad skills. Got a big night out or just wanna switch up your vibe? These babies save time and make your nails look like you just left a fancy salon. Here’s the step-by-step to go from prepping your nails to peeling those stickers off, so you get a killer look that lasts.

Step 1: Get Your Nails Prepared
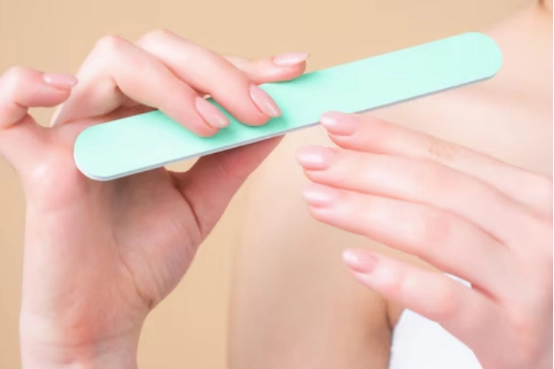
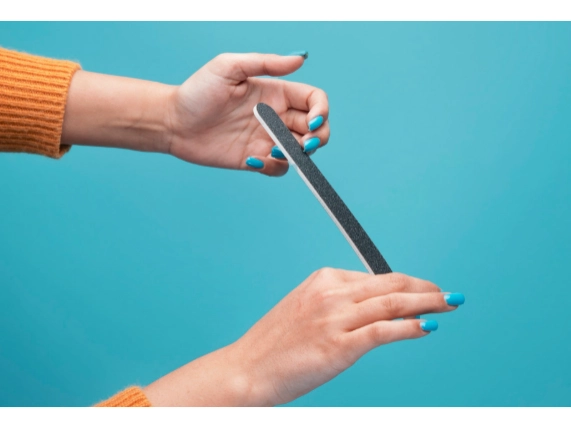
Shape and Tidy Up
Kick things off fresh. Grab a nail file and shape your nails so they’re nice and even. Smooth out any jagged spots. It makes your nails look cute and helps stickers stick tight.
Clean Off Gunk and Water
Oily or wet nails are a no-go. Wipe each nail with an alcohol pad or some nail polish remover with acetone. This keeps your stickers from popping off too soon.
Nudge Back Your Cuticles
Gently push your cuticles back with a cuticle pusher. This gives you a nice, clean surface. It also stops stickers from grabbing your skin, which makes them peel early.
Step 2: Pick Your Perfect Stickers
Find the Right Fit
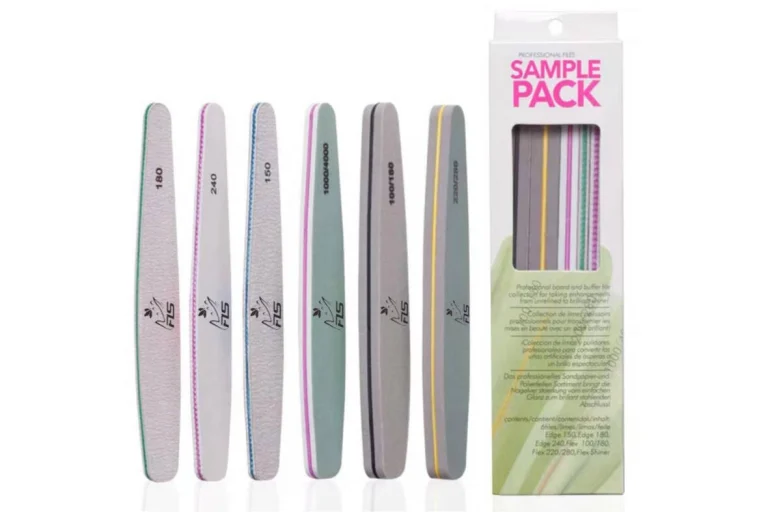
Sticker packs come with a ton of sizes. Pick one that matches each nail’s width. Pro tip: If you’re stuck, grab the smaller one or snip a bigger one to fit.
Know Your Sticker Vibe
Full-Cover vs. Tip Stickers
Full-cover stickers take over your whole nail. They’re awesome for bold, in-your-face designs. Tip stickers just hit the ends. They’re perfect for French tips or a chill accent.
Pre-Cut vs. Custom Sheets
Pre-cut stickers are good to go, shaped for each finger. Custom sheets let you cut whatever shapes you’re feeling. They’re great for getting creative.
Felice has over 500 designs to vibe with, like Beautiful Design Nail Art Wraps with Cute Animals, Hello Kitty, Butterflies, Flowers, and Holiday-Themed Christmas Gel Nail Strips. They’re non-toxic, long-lasting, semi-cured UV gel stickers.
Step 3: Stick ‘Em On Like a Boss
Line Up by Your Cuticle
Peel off the protective film. Pop the sticker close to your cuticle, but leave a teeny gap from your skin. This stops it from lifting.
Yank off the clear film. Peel the nail wrap and stick it dead center on your nail. Leave a little space on both sides by your cuticle.
Press Down to Skip Annoying Bubbles
Once it’s sitting pretty, press from the middle out to the sides. Start in the center, then push the edges down hard. This makes it stick smooth and keeps air bubbles out.
Chop Off Extra Bits
If the sticker’s hanging off your nail tip, snip it with tiny scissors or clippers. Then file downward to make it fit just right.
Step 4: Lock in the Vibe
File Down for a Clean Look
Grab a soft nail file. File downward to trim any extra sticker. Go gentle so you don’t mess up the edge.
Slap on a Top Coat to Keep It Fresh
Lots of gel wraps hold up fine solo, but a top coat adds shine and makes ‘em last forever. Felice’s Matte Tempered Top Coat is the bomb. It’s tough, goes on super easy, and doesn’t chip or scratch.
Let It Dry Totally
If your top coat needs a UV lamp, give it time to set. For regular ones, let ‘em air dry all the way before you mess with your hands.
Step 5: Keep Your Nails On Point
Stay Dry for a Hot Sec
After sticking ‘em on, don’t get your hands wet for at least two hours. This gives the glue time to lock in.
Throw on Gloves for Chores
Keep your nails safe when you’re scrubbing dishes or cleaning. Pop on gloves to block harsh stuff that can loosen your stickers.
Add Top Coat Every Few Days
To keep your nails looking fire, add a new layer of top coat every 2–3 days. It stops chips and scratches.
Step 6: Peel ‘Em Off Easy
Soak in Warm Water or Use Oil
Ready to switch it up? Soak your nails in warm, soapy water. Or dab some cuticle oil around the edges. This loosens the glue so stickers slide off no problem.
Peel Slow to Save Your Nails
Peel stickers off super slow from one side. Grab an orange stick if you need a nudge. Don’t rip ‘em off fast—it can mess up your real nails.
Moisturize After
Rub some nourishing oil or hand cream on your nails and cuticles. Keeping them hydrated helps your nails stay happy after stickers.
Want gel nail stickers that look fire and are crazy easy to use? Felice is your jam. These gel wraps are made of eco-friendly gel that shines like crazy. They’re self-adhesive, so you just slap ‘em on. Perfect for pros or just playing around at home.
Felice has over 500 awesome designs, from festive Christmas and Halloween looks to cute floral vibes. Grab Felice to make your nails a total vibe with zero stress!
FAQ
Q: How long do nail stickers last?
A: They usually stick around for 7 to 14 days. Depends on the sticker quality, how good you put ‘em on, and how you treat ‘em. Add top coat every few days and keep ‘em dry to stretch it out.
Q: Can I stick stickers on polished or fake nails?
A: Heck yeah! You can put ‘em on polished or fake nails. Just make sure the surface is clean, dry, and smooth so they stick tight. Skip bumpy surfaces, or they might peel.
Q: What if a sticker starts peeling at the edges?
A: Gently push it back down with a clean finger or orange stick. Dab on a thin layer of clear top coat to keep it in place. Don’t yank or pick at it to avoid wrecking your nail.
Q: Are stickers cool for weak or brittle nails?
A: Solid gel stickers, like Felice’s, are usually fine for weak nails if you put ‘em on and take ‘em off right. Moisturize after peeling ‘em off. Don’t rip ‘em off rough to keep your nails safe.